Cape Chignecto: A Fall Adventure in Nova Scotia’s Wilderness

Cape Chignecto Provincial Park in Nova Scotia offers stunning coastal scenery and a challenging hiking experience. The author shares their solo journey in October, contending with steep ascents, unpredictable weather, and water supply challenges due to a drought. Despite difficulties, the experience fosters appreciation for nature and proper preparation.

Cape Chignecto is a provincial park in West Advocate, Nova Scotia, about three hours’ drive from Halifax airport and a three-and-a-half-hour drive from my home in Annapolis Royal, Nova Scotia.

The journey to and from is lovely in and of itself, pastoral farmland is quickly replaced by rugged coastline and the bay of Fundy with its dramatic tidal basins make the ocean look endless with the tide in or as if it is a giant beach when the tide is out. I went during the first week of October, when the entire province seems to be a riot of fall colour and foliage. this also presents some challenges with the weather being generally unpredictable in the fall. Luckily, the weather was great, except for the torrential rain I got caught in on the last day.

My start from the visitor centre was great, the check in process very easy and many of the warnings that are visible on the website are repeated by the staff with great care. This past year in NS, there was a historic drought, so the park had set up water stations and marked them on the updated map. One thing that is important to note, is that even though this is a provincial park and a relatively closed loop and everything is well marked, this is still a “wilderness zone” as such, it is important to bring a compass or GPS system, and some emergency items in case you get lost. One of these items should be a map. If you are like me, you probably hate that at every turn in the Hiking industry there is someone telling you to spend more money for everything, including but not limited to adequate mapping. I am here to tell you spend do not need to spend a tin of money on maps, depending where you are going. In this case, you can download topo maps, and trail maps from the website, in a handy PDF format. Once I had them all downloaded, I printed and laminated them at the library, so all my maps for this trip cost about three dollars. The laminating was a great call, this ensured they would stay dry if I dropped them in the water, or got rained on. This experience ensured I will never take the library for granted again.

My pack weight was 45lbs. not too heavy but not exactly light. Also, do remember dear reader, I am alone, no one to help carry the weight, so keep that in mind when we start ascending 500m up the Fundy cliffs.

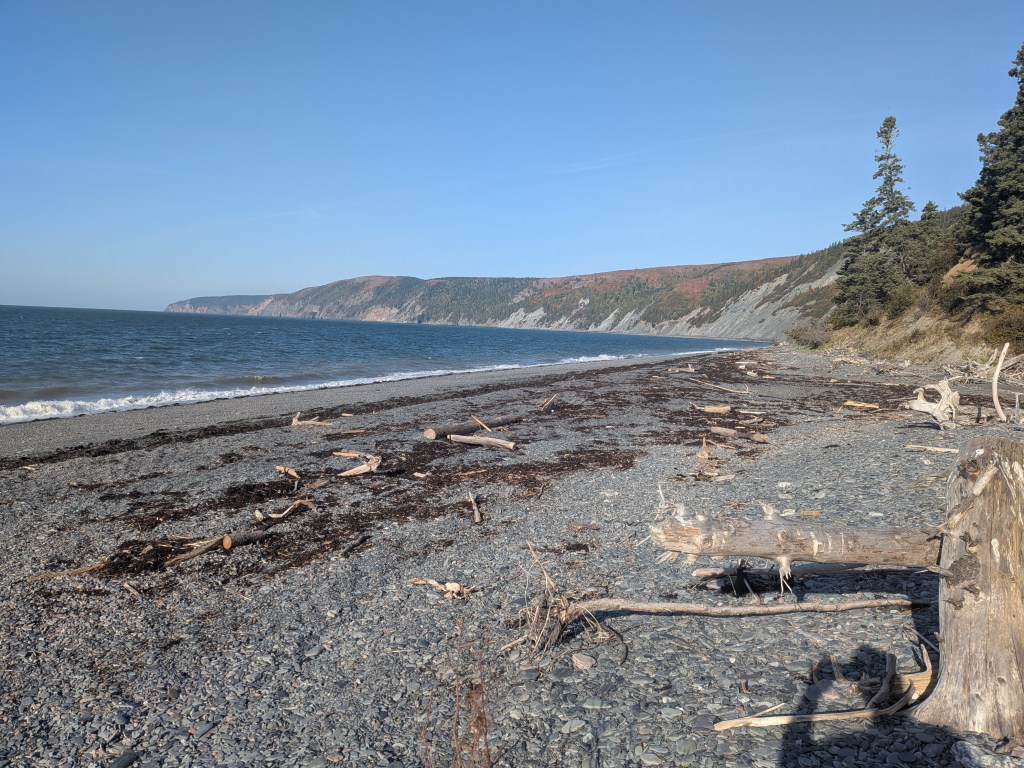
Once I had set off from the visitor centre, I was able to walk the first kilometer on the beach, something that is only possible at low tide, this is the only part of the journey that requires tide time knowledge, which seems deceptive considering it’s a coastal trail. But after the rocky beach walk, that when the real fun began. The first 5km, like the entire first day, is uphill and very steep. To say I was unprepared for what lay ahead would only be a small understatement, it was how steep the climb was that took me aback, as it does not look this steep on a topo map.

And yet at the first view spot I was completely out of breath. This is when it was great to be alone, so no one could see me sweat. I made the decision to pull out my neck gator and take my sweater off, and that kept the sweat off my neck as the daytime temp never went above 10C and I didn’t want to catch a cold.

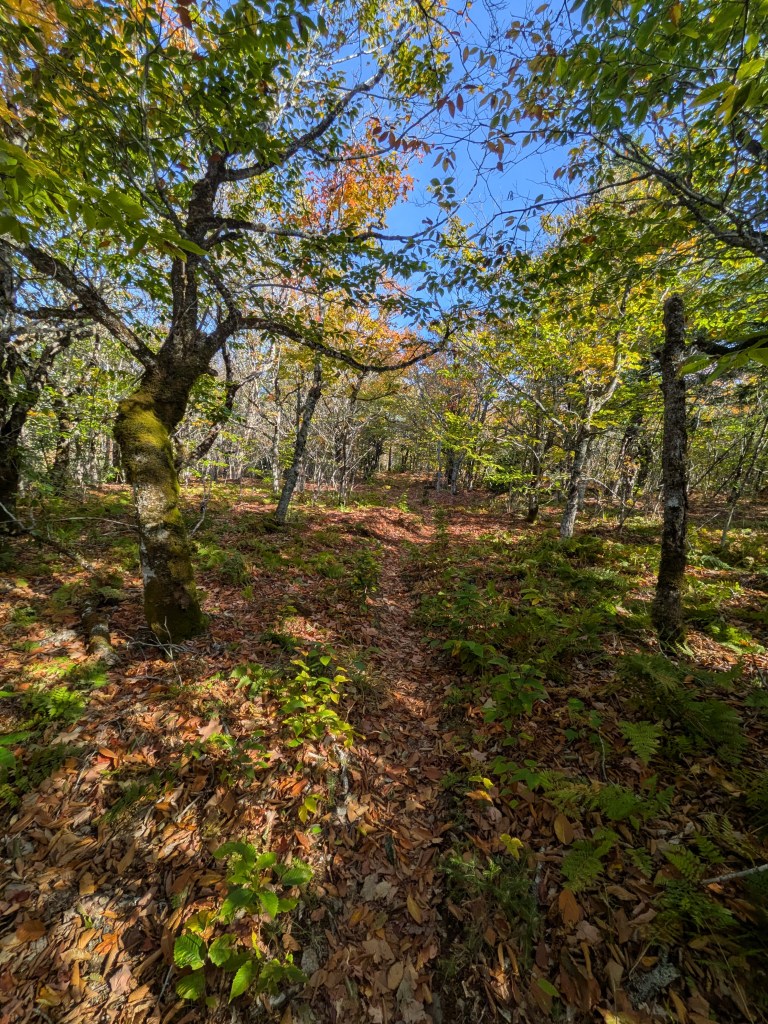
Sadly, the last good view on the day was at KM marker 4 as the path diverges into the forest, the path also leveled out quite a bit and then I was able to catch my breath and start making some progress on the day. A quick lesson I leaned that morning, progress only feels good when you return to your normal speed. I literally at times and figuratively crawled to this point and believed that I would never make it to the end, but of course, I did. As I hiked off into the woods, I felt great, and focused on the birds, the trees and my own breath.

The last 15km of the first day were by comparison, noneventful. The trail was a little awkwardly marked as I approached a marshy area as I came close to the Eatonville bunk house, but AllTrails helped me navigate that bit. Unfortunately, the only water on the map was at the Eatonville bunk house, and as I passed it, I decided not to stop for water, preferring to find my campsite for the night and have a nap. I got to the campsite at around 2pm, at a giant field that could have slept 100 people, but it was only me. In hindsight, I should have stayed at site #7, hidden away from the field, by a little brook which had very little strength given the drought that had been going on and was not a good water source. Which meant hat I had to hike 2km each way to fill up my water, so I set up my camp, repacked my bag and headed off for the cabin. It was closed for the season, but for anyone not interested in sleeping outside, they look nice, and sleep about 8 people.

All in all, it was a long day, the hottest of the three, and the least interesting from a lookout perspective. I got to sleep around 930pm, ready to wake up at 6am to start the next day which proved the most arduous.

What Is a Quillow? Your New Backpacking Essential

Hands up, who typically uses their backup clothes as a backpacking pillow? There is a TON of opinions on this in the backpacking sphere, so I thought I would add my voice to the mix.

On that note, I give you the quillow. My wife has been making them since she was small as it’s a very basic pattern that she leaned from her grandmother. The rudimentary design is as simple as it sounds, it’s a blanket that can fold into a pillow. Its stitched so that it’s a box blanket with a pocket on the end. And it folds and rolls in a very similar manner to a sleeping bag. You can make it out of any material that is suitable for a sewing machine. My quillow is made from partially recycled fiber Polar Fleece. I also treated the fabric with Grangers repel plus to add some water repellency to it.

Another plus, is that I don’t have to blow it up, or bring a mini pump to do so, thus eliminating an extra component to bring with.  

PROSCONS
Extremely soft, comfortable and warmTakes up space or requires a separate dry bag
Doubles as a robe/dressing gown 
Can be used as an extra blanket layer in sleeping bag 
Made with love and reminds me of home on longer trips 

All in all, it’s the perfect luxury to bring on short backpacking trips where you can make space for it, and great for car camping to save some space. A pillow on any trip beats smelly spare clothes and the hard ground any day!

Solo Backpacking Prep: Cape Chignecto Guide

Come prep with me to hike Cape Chignecto, a series

I think that as the fall starts to wind down, the temperatures drop and winter starts to set in, backpackers start to think about what trails to take on next year. I am no different, but I live in Nova Scotia, so while it gets cold, I won’t be dealing with snow until January so I still have some more outside time to enjoy. This winter will be different because ill be planning my first solo backpacking trip and I’ve chosen the Cape Chignecto Coastal Loop in West Advocate, NS.

I choose this hike from reading various blogs and articles after googling “beginner backpacking hikes in Nova Scotia”. And the main reason I settled on Cape Chignecto is because the consensus on trail reviews was that the trail is well marked, and is a loop, so the chances of getting lost are lower, obviously not zero, but there should be limited navigation work all things being equal. That said, I hate being unprepared, and since I’ve never been here before, I’ve made this the first of a series on how I’m personally preparing for this adventure.

The first thing that I did was figure out the total distance and the total time it might take. Finding the distance was easy as it’s listed on Alltrails and the cape Chignecto website (+/-52km if anyone is wondering). At this point, you might be thinking, all you do is divide the total distance by days you have available, and then you can manipulate those numbers until you have a reasonable pace. Unfortunately, this doesn’t work so well in the real world, to do this hike in say 3 days is 17.5km per day, but remember, you are also carrying three days’ worth of supplies, so 17km might be too much in one day.

What I did instead was to start to look for itineraries from other people, that would give me insight on campgrounds also. This is a provincial park and its illegal to camp without a permit and outside of designated zones. So, reading about other people’s trips is helping me to plan my days and route.

So, I’ve now determined that ill need 4 days to be safe, but am going to plan to hike it in three days. Taking time off work in the warm moths can get tricky for me in my profession, so that might be all the time I get.

So, you may remember I said this trip would be solo, but I wouldn’t want to dis-include my wife or dog since they enjoy the outdoors but aren’t interested in a trip like this necessarily. With that in in, I’ve been trying to find dog friendly hotels or inns in West Advocate for my wife and dog to stay in while I do this hike. That way, they can also be near in case something goes wrong, but also to greet me when I get back because the best part of my day is seeing them. The two of them can have a little mini holiday while I thru hike a shortish trail, win win.

The next thing to do was figure out my daily distances and where to stop. Given my somewhat constrained timings, my first day would have to be fairly short. While I’m in planning mode, all my checklists tend to run simultaneously through my mind. So even just the thought of having a short day one brings a little relief to mind since I know that my pack will be the fullest at this point with food, fuel and gear, and that I’ll already be tired and cramped from driving to the trail, since its about a three-hour drive, not to mention ill be getting a late start since ill have to check my wife and dog into their accommodation.

I’ve elected to take the trail clockwise, and that means the coastal side first. But also, my first campground could be either 7.5km or 13.5km from the start, for me and my fitness level, I’m open to either of these options right now. Ostensibly I’m leaning to having the 13.5km option on the first day. There are a couple reasons for this, one, it will shorten day two so I won’t have to get up at dawn and pack up and start going again, and two, I’ll have more tie for taking pictures since ill be going through the scenic coastal portion of the trail. I personally hate feeling like I don’t have tine to look around at trees and birds and whatever else is out there, because that the whole point of being in nature.

Well, that’s as far as I’ve gotten for now, lots more to come with day planning and campsite planning and gear, I’ve only just gotten started so keep getting ready with me!